
People ask for a spray foam assessment for different reasons. A surveyor has flagged the loft. A lender wants evidence. A damp patch has appeared on a bedroom ceiling and the roof was insulated a few years ago. Or the owner simply wants to know what they have before deciding whether to leave it alone. The assessment is the same piece of work in each case: a look at the foam, the timbers it covers and the roof covering above, written up with photographs.
It is worth being clear about its limits. Foam sprayed over a whole slope hides the very thing you most want to see, so an assessment works partly by direct sight, partly by instruments and partly by judgement. Done well, it settles the practical question of whether to leave, repair or remove, and gives you a document to hand on. This guide walks through each stage. For the bigger picture, see our spray foam insulation removal page.
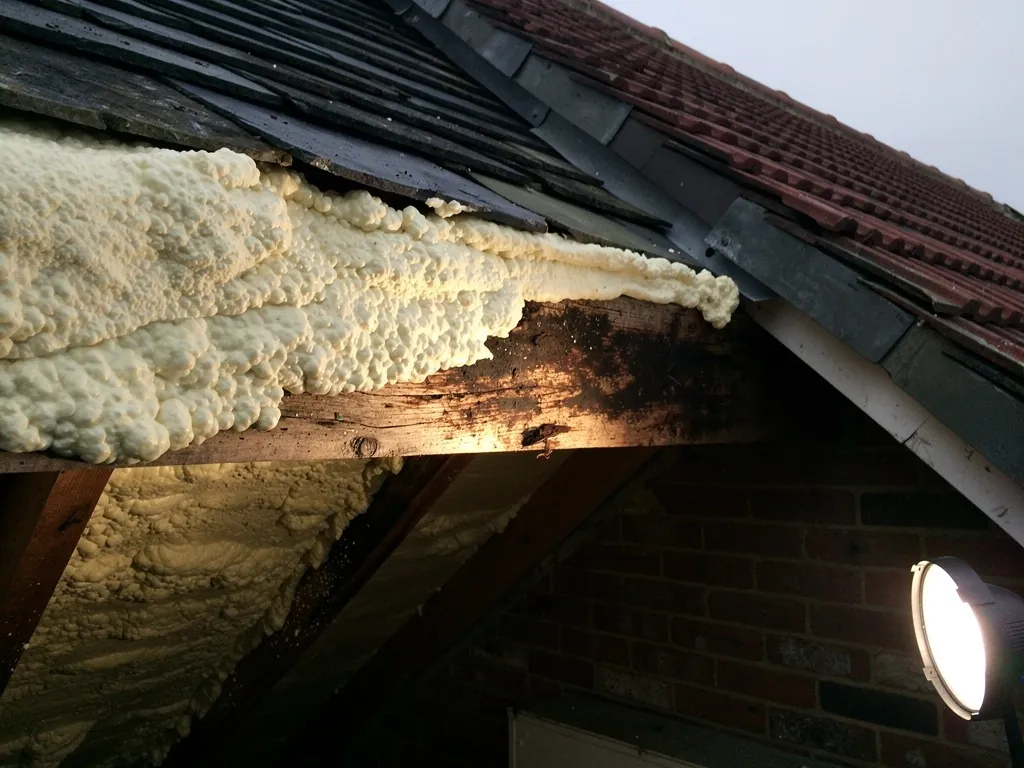
Before anyone goes into the loft
The visit starts with a conversation and some paperwork. We ask when the foam went in, who fitted it, whether anything was said about ventilation or condensation, and why you are asking now. A leak that began after the installation points one way. A surveyor's note that mentions nothing but the foam points another. Each tells us where to put the most time.
Any documents you hold are useful: the installer's invoice, a guarantee, a product data sheet, a condensation risk calculation if one was done. None of them is required, and many homeowners have nothing at all. If you have photographs from before the work, they can show how the roof looked when the rafters were bare.
Must the owner be present?
Someone should be there, at least at the start, so that we can see the loft hatch, the landing and any rooms with ceiling stains. We also want to hear what you have noticed: smells, a cold bedroom, mould in a corner, condensation on windows. Those details are part of the evidence.
Will the loft need clearing?
Only enough to reach the roof slopes. If the loft is boarded and full, we will tell you beforehand what needs to be moved, and we do not take stored items out ourselves.
Identifying the foam and how it was applied
First we establish what has been sprayed. Open-cell foam is soft, light and spongy, and it can be pressed with a thumb. Closed-cell foam is dense, firm and often rigid, with a tight skin. The Energy Saving Trust links open-cell foam with a lower rot risk for the rafters, so the type is the first thing we record. The colour, texture and thickness go in the notes with photographs.
Then we see how it has been laid. Some installers spray only between the rafters, leaving the faces of the timbers visible. Others cover everything, rafters included, in a continuous layer. Some roofs have been foamed over old felt, over a breathable membrane or directly onto the back of the slates or tiles. Each arrangement changes what can be inspected and what removal would involve.
The thickness matters too. A thin coat on the underside of a covering behaves differently from foam that fills the whole rafter depth. We measure at several points and note where it varies. Gaps, shrinkage and places where the foam has pulled away from the timber are recorded, because they are where moisture can collect.
Why does the application method matter?
Because it decides how the roof can dry. Where timber faces are exposed, any damp has somewhere to go. Where they are sealed, the only route is back through the foam, which closed-cell does not allow. Our guide to spray foam removal cost explains why the same detail also affects the work and price of removal.
Moisture readings and the condition of the timbers
The timbers are the main subject. We use a moisture meter on every accessible rafter, purlin, wall plate and batten, and we write down the readings with a note of where each was taken. Pin meters push two small probes into the wood; pinless meters read through a surface. Neither tells the whole story alone, and a reading is always set beside what we can see.
Where foam covers the timber, we look for the places where it can be reached without harm: the junction with the wall plate, around roof windows, beside the chimney, at the ridge and at the eaves. Small inspection openings can be cut where the foam is thick enough to allow a clean edge, and a camera on a flexible arm can look behind or beneath it. These openings are patched afterwards. Cutting is a judgement call and we explain it before we do it.
A single high reading on one rafter is a prompt to look harder there, not a verdict on the whole roof. The pattern across the slope is what tells us whether a problem is local or general.
What are the signs of trouble?
Dark staining, softness when a probe goes in, a musty smell, fungal growth, crumbling timber and rusted nail tips are the main ones. Foam can also hide old leaks, since water that entered before it was sprayed is sealed in. Our guide to inspecting rafters after spray foam goes into those signs in more depth.
Is a thermal camera used?
Sometimes, as a guide. MyBuilder's roof inspection guide lists thermal surveys as a more expensive type of inspection, and they can highlight cold spots and moisture patterns. A thermal image is a prompt to look closer, not proof of damage.
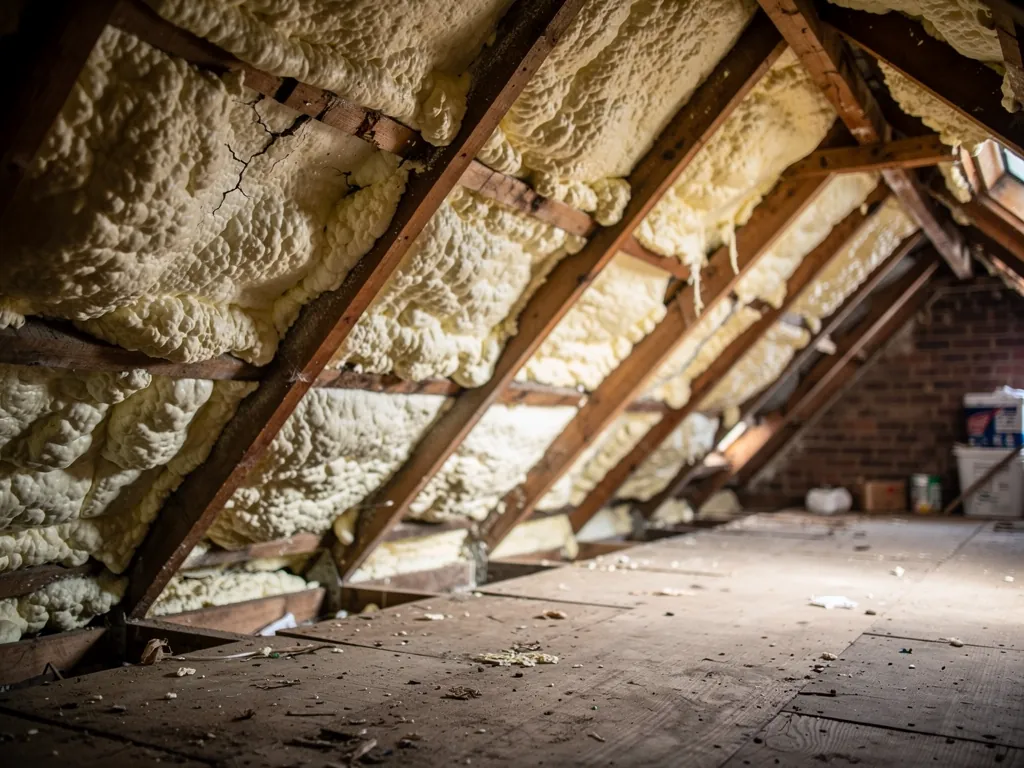
The roof covering, from underneath and outside
Foam hides what is behind it and also changes how the covering behaves, so the assessment looks at the tiles or slates as well. From inside, we check for daylight at the eaves and ridge, for staining on battens, for rusted nails and for any slipped or cracked pieces whose edges we can see. Where foam has stuck fast to the covering itself, we note it, since removal can lift the pieces.
From outside, where safe access is available, we look at the same roof from above. Cracked or missing tiles, failed ridge mortar, tired flashings, blocked valleys and open verges all let water in, and any one of them could be the reason the timbers beneath are damp, whether or not foam is involved. Fixing the foam but leaving the leak would be a mistake, which is why the covering is part of the assessment and not a separate job.
Why look at the outside at all?
Because a damp rafter is a symptom with several possible causes, from condensation to a failed flashing. Reading the foam is only half the diagnosis. Our guide on spray foam and roof condensation shows how we tell the two apart.
What about flat roofs?
A flat roof with foam beneath it works differently, with a deck, a membrane and often no ventilated void. The checks and the risks change, and we cover them in our answer on spray foam on a flat roof.
Ventilation, the ceiling below and the rest of the house
A foamed roof often has little or no designed ventilation, so we note what there is. Eaves vents, ridge vents, tile vents and soffit ventilators are all recorded, along with any that have been blocked by the foam. The guidance behind this is BS 5250, which Marley sets out for cold roofs: 25 mm of eaves ventilation for pitches of 15 degrees or less and 10 mm for steeper ones, with extra high-level ventilation in some roofs.
We also look at the ceiling and the rooms underneath. Moisture-laden air from bathrooms and kitchens may be escaping into the roof space through light fittings, hatch edges or pipe holes, and in a foamed roof it ends up at the cold face. A bathroom fan ducted into the loft instead of outdoors is a regular find. These sources of moisture matter whatever happens to the foam, and removing foam without dealing with them would let the problem return.
Does the heating or occupancy matter?
A little. A home that is lived in all day, with drying clothes indoors and few open windows, makes more moisture than an empty or lightly used one. We ask, because the answer shapes the advice on ventilation and extraction.
The written report and what it contains
After the visit you receive a written report with photographs of your own roof. It lists the foam type and thickness, where it was applied, the moisture readings and their locations, the condition of the timbers that could be seen, the state of the covering, ventilation findings and any sources of moisture in the house. Most importantly it ends with a plain recommendation: leave as it is, monitor, repair, remove in part or remove in full.
The report is written for several readers. You need it to decide. A surveyor, buyer or conveyancer may need it to close a query, and the guide to selling a house with spray foam shows how it is used in a sale. A lender or an equity release provider may want it too, and our page on spray foam and equity release explains why. We cannot promise any lender will accept a particular report, because that is their decision.
Does a good report mean the foam can stay?
It can. If the timbers are dry, the covering is sound and ventilation is acceptable, the recommendation may be to leave the foam and recheck in a year or two. We favour the least work that settles things, and sometimes that is none.
What an assessment costs and where it leads
MyBuilder's spray foam removal guide, updated on 21 August 2026, puts an assessment at £100 to £200 nationally, and its roof inspection guide lists standard inspections at £150 to £250. Roof size, the number of openings needed and the distance travelled all play a part, and we agree the figure before we start. Should the findings lead to work, you get a written quote, and removal figures are set out on our spray foam removal cost page.
The recommendation sets the next step. If removal is advised, the work is planned around the foam type and how the timbers look. If repair is advised, it is usually a patch of damp timber or a leak on the outside, which is smaller than a full strip. And if no work is advised, you keep the report as a record. Our 10-year workmanship guarantee covers any work we carry out, and the survey itself carries no obligation to proceed.
To arrange an assessment, send us a few photographs of the loft and tell us what prompted the question. The RICS consumer guide is a good thing to read beforehand, since it lists the questions a surveyor is likely to ask.