
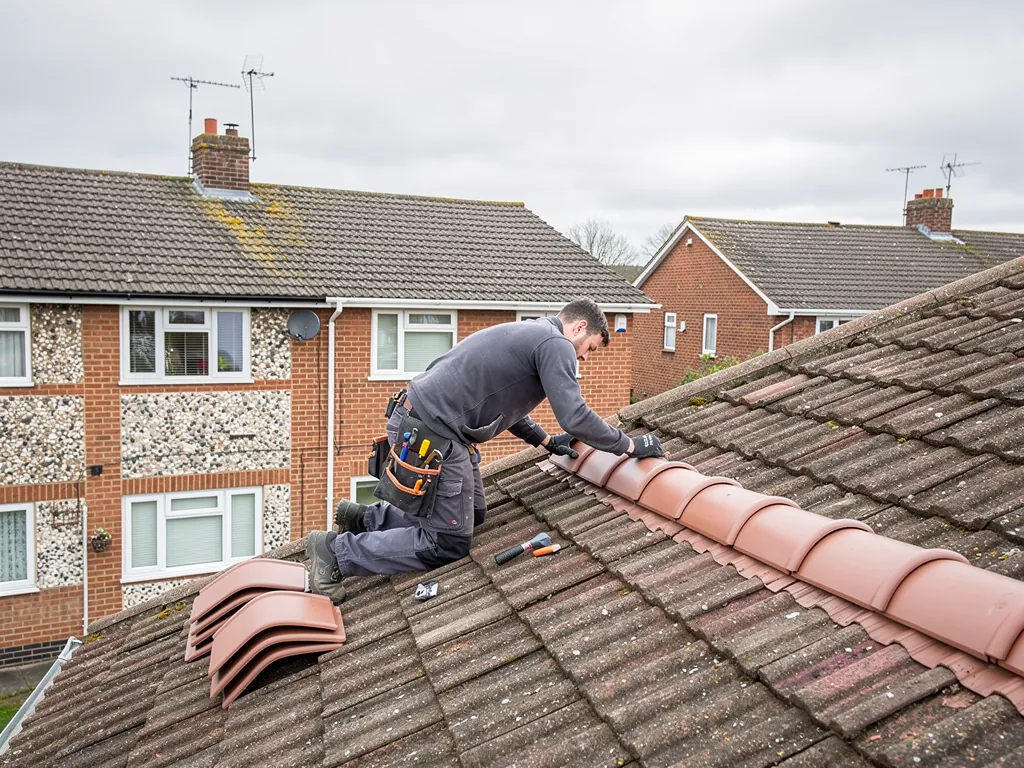
Rebedding means lifting the ridge tiles, clearing the old mortar and laying the same tiles, or matching ones, again on a new bed. It is the standard repair when ridge tiles have come loose along a stretch of roof, when the joints have cracked beyond simple repointing, or when the bedding has washed out and left the tiles rocking. Done well, it gives a ridge that sits level, seals against rain and stays put in a gale.
Done badly, it can look neat for a year and fail the first winter. The difference is nearly all in the preparation and the fixing, which are the parts that disappear from view when the job is done. This guide takes the work in the order a roofer does it: the strip, the mix, the mechanical fixing and the pointing. Beside it, our guide to hip tile repairs covers the same method on a hip, and the main ridge, verge and dry-fix page lists the rest of the group.
When rebedding is the right repair
Repointing treats the joints only. It works when the tiles are firm and the bed behind the pointing is still sound. Rebedding is needed when the bed itself has failed: tiles that move under a gentle push, mortar that crumbles when picked at, joints that have opened because the tile has settled, or a ridge line that dips and wanders because the bed has slumped.
The test is simple and we do it on survey. A roofer checks tile by tile on the ridge, feeling for movement, and photographs any that shift. If most of the ridge is firm and only a few tiles are loose, the repair can be local. If the movement runs along the whole line, it is cheaper in the end to relay the lot than to patch a ridge that will be failing elsewhere within a year or two.
Ridges also need rebedding when a leak is traced to them. Water that gets under the bed runs down the rafters, and the stain on the ceiling can be some distance from the ridge. Our guide to the BS 5534 ridge fixing standard explains why a rebedded ridge is expected to include mechanical fixings, and our cost guide for the group sets out what drives the price.
Can I rebed over the old mortar?
No. New mortar will not bond to a crumbling bed, and the tiles will end up sitting higher than they did, with a gap underneath. Old mortar has to come out, and the surfaces have to be clean enough for fresh mortar to grip.
Stripping and checking what is underneath
The first job is to lift the ridge tiles one at a time, working from one end. Each tile is knocked free, cleaned of its old mortar and stacked. Tiles that are cracked or have chipped edges are set aside for replacement, and any that ring dull when tapped, a sign of an internal crack, are treated the same way. We keep the sound ones together so they can be relaid in the same order, because a handmade or weathered tile tends to sit best in the place it was shaped to.
With the tiles off, the roof is exposed, and that is the point at which the real condition shows. The old bed is raked or chiselled out, and the top course of the roof tiles or slates on each side is checked, since they are often cracked or slipped from years of water getting under the ridge. The ridge board or rafter ends, the batten and the underlay edge are inspected for rot, moisture or damage, which is the part that does not show from the ground.
This is also where hidden problems turn up: a rotten ridge batten, an underlay that has perished at the apex, or a gap where the roof tiles have been cut too short to meet the ridge. A repair that skips this step buries those faults under fresh mortar. Photographs of these finds go to you, along with a note of any extra work needed before the new bed goes on.
The mortar mix and why it matters
A bedding mortar has to do two jobs that pull against each other. It needs enough strength to grip the tile and enough give not to crack the first time the roof moves. A mix with too much cement dries hard and brittle, bonds to the tile too firmly and cracks along the joint. A mix that is too weak crumbles and washes out. The ratio, the sand and any additives all affect the result, and our guide to ridge mortar mix goes through the options in detail.
Sharp, well-graded sand makes a workable bed that grips the tile. Soft building sand can make a mortar that looks fine when wet and shrinks as it dries. On older roofs and in sensitive settings, a lime-rich mix is often the better choice, since it is a softer material than cement and allows damp to escape through the joint. Pigment can be added so the finished mortar blends with the tile instead of showing as a pale stripe, and a test patch on a spare tile shows how it will dry. Mortar also darkens a little as it cures, so a mix judged only by its wet colour can mislead.
The mortar should be mixed to a consistency that holds its shape on the trowel without slumping or cracking. In cold weather or in rain, mortar has to be protected or the work postponed, since frost damages fresh mortar before it has set. Dry weather helps; very hot sun can dry the surface too quickly and leave it weak.
Should the mortar be waterproofed or coloured?
Colouring is a matter of looks. Waterproofing additives have a limited role and cannot replace good workmanship, so we treat them as optional and talk through them at the survey if you ask.
Mechanical fixing under the mortar
Since BS 5534:2014, a rebedded ridge is not supposed to rely on mortar alone. Marley takes the view that tensile strength in the mortar cannot be trusted to resist uplift, so bedded tiles and fittings are expected to have mechanical fixings. This is the part of a rebed that distinguishes a modern repair from an old one, and it is worth asking any roofer how they will fix your tiles.
The method varies with the roof. A common arrangement has a ridge batten fixed along the apex and a stainless steel fixing passing through each ridge tile, or through a clip or cramp that holds it, into the batten. Another approach uses a bracket system that grips the tile edge. The fixings must be corrosion-resistant, long enough to bite into sound timber, and positioned so the tile is held without being cracked by over-tightening.
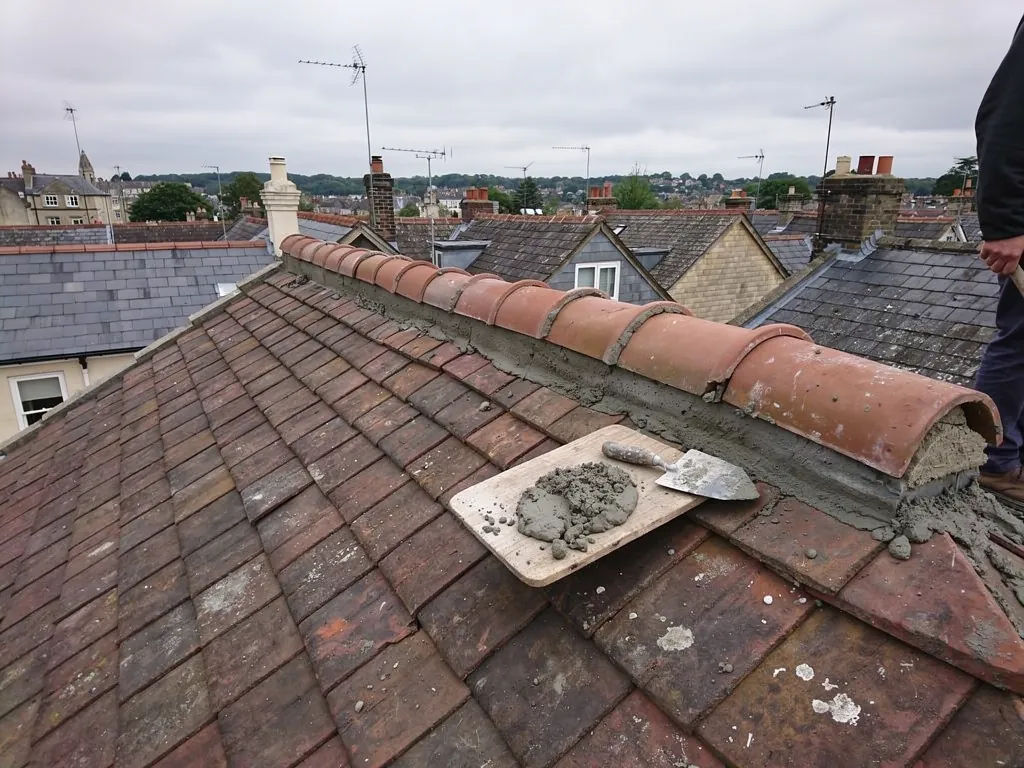
Once the fixing is in, the tile still gets its mortar. The bed seals the joint between tile and roof, fills the gap along the ridge and gives the finished line its appearance. So the mortar and the fixing do separate jobs. If the mortar fails in later years, the tile stays put, and the pointing can be refreshed without relaying anything.
Ask what holds each tile down apart from the mortar. A good answer names the fixing, the batten and the material, not just "it will be fine".
Bedding, jointing and pointing the ridge
With the base prepared and the mix ready, the ridge goes back from one end. A bed of mortar is laid along the apex and a tile is pressed into it, brought to the right height and angle, and checked against a line so the ridge runs straight. The end of the tile next to it is buttered with mortar, so each joint is full and not just a thin line at the surface. Hollows left inside the joint are where water collects and freezes. Where the roof tiles beneath are cut to meet the ridge, the gap between them and the ridge tile is filled so that wind-driven rain cannot get up under the bed. On a roof with a ventilation requirement at the ridge, the bed is kept clear of any gap that is there for airflow.
As the tiles are set, the fixings are tightened and the excess mortar is struck off. Joints are then finished flush or slightly recessed, so they shed water rather than collecting it. Mortar smeared across the face of a tile is cleaned off while it is still soft, since dried mortar leaves a stain and is difficult to remove without damaging the glaze or the surface.
At the ends, the last tile needs a proper closure: an end cap, a gable end tile or a neat mortar detail, depending on the roof. Where hips meet the ridge, the junction is built up carefully, because it is the point most likely to leak. If you have a verge as well, the method for the edge of the gable is described in verge repairs.
Why do some rebedded ridges look uneven?
Usually because the tiles were laid by eye, without a line, or because the bed was too thin in places and too thick in others. A good rebed should run straight from the ground and have even joints. If you can see a wobble from the garden, raise it before the scaffold comes down, while it can still be put right in one visit.
Time, weather and what a rebed costs
A rebed is not usually a long job on a small house, though a long run of ridge with several hips takes more than one visit, but the run of the ridge, how many hips there are and the condition of what lies beneath all stretch or shorten it. The weather decides when it happens. Fresh mortar does not go on in frost or heavy rain, and strong wind makes work on the ridge unsafe, so the job is booked around a dry spell. Our winter ridge repairs guide explains which parts of the work can go ahead in cold months.
For cost context only, MyBuilder's slate roof cost guide, updated 21 August 2026, shows about £200 to £400 for repointing ridge or hip tiles and £300 to £600 for the larger rebed. Treat those as national guide figures, not as a price from us. Your total follows the size of the ridge, the hips, the access, the number of tiles that need replacing, and what we find underneath once the old bed is out. When you compare quotes, see whether VAT and the scaffold are counted in.
A written quote follows the visit and carries photographs of your own ridge. Our aim is a job sized to the fault: where repointing is enough, that is what we put forward, and where the whole ridge must be relaid, the quote explains why. Ten years of workmanship cover is set out in a written document, and when the work ends the roof area is swept and the rubble leaves with us.
To book, ring 01793 626096 or reach us by WhatsApp or the contact form on this site.