
Look along the top of a roof that has been given a dry ridge and, from the ground, it can pass for a traditional one. The ridge tiles are the same rounded or angled shape. The difference is underneath and between them: no band of cement, but a set of manufactured parts that hold the tiles down and keep the weather out.
That makes the system sound simple, and in principle it is. Still, there are several components, they have to suit each other and the tiles beneath, and a fault in any one can undo the rest. This guide describes what each part is for, in roughly the order it goes on. If you want the background to why dry-fix became standard practice, read our piece on BS 5534 and ridge tile fixing. The service overview is on the ridge, verge and dry-fix page.
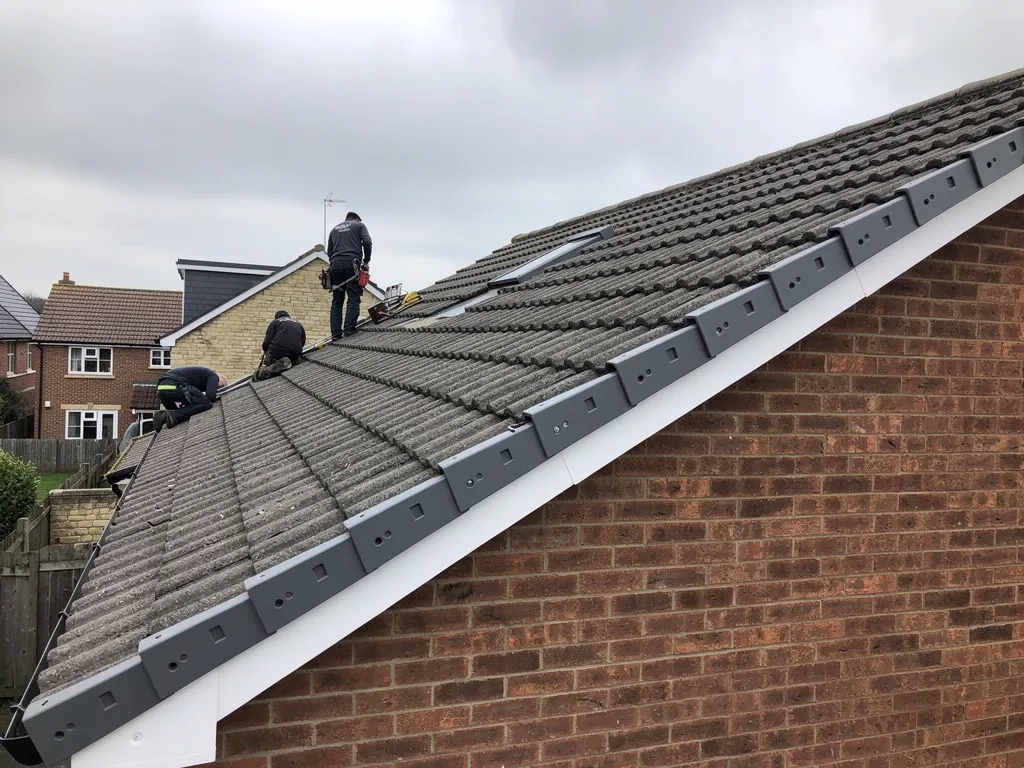
The idea behind a dry ridge
A traditional ridge is bedded on mortar, which does two jobs at once. It sticks the tiles in place and it seals the gap between them and the roof slope. When the mortar cracks, both jobs fail together.
A dry system splits the work between separate parts. Fixings hold. A flexible strip seals. A line of timber gives the fixings something solid to bite into. Because each part has one task, a problem in one place shows itself without taking the whole ridge with it. A cracked ridge tile can be lifted and replaced without chiselling out a run of old bedding, and the joints do not rely on a material that shrinks as it dries.
The other attraction is speed and weather tolerance. Mortar needs time to set and prefers dry, mild conditions. A dry ridge is mechanical, so the work is less dependent on the day, and the finished ridge does not need to cure before it can take weather.
The trade-off is that a dry system depends on every component being present and correctly fitted. A bedded ridge with a few gaps still mostly works, whereas a dry ridge with a missing clip or a lifted strip can fail suddenly at that spot. That is why the parts and the fitting matter more than the label on the box.
The ridge batten and its brackets
The foundation of the system is the ridge batten, a length of treated timber laid end to end at the apex, right on the join between the slopes. It is fixed to the roof structure through brackets or supports, and it gives the ridge tiles a straight, level line to be screwed or clipped to.
Roofs are not perfectly straight, so the batten line is where a careful fitter earns their money. Old houses sag and shift, and a ridge board that dips in the middle needs the batten packed or adjusted to run true. A wobbly batten shows up straight away as a wavy ridge line when the tiles go on.
Does the batten have to be treated timber?
It should be, because it lives in a damp, cold spot at the top of the roof space, and untreated timber there will rot. Manufacturers specify the batten size and the support spacing for their system, and those details are part of what is tested. Using a different section or spacing than the maker intended changes the system.
What if the ridge board underneath is rotten?
Then the batten has no firm timber to take its fixings, so the rotten section is sorted out first. We check this at the survey from inside the loft where we can, because a dry system is only as secure as the structure beneath it.
Union strips, seals and the weatherproofing layer
With the batten fixed, the gap between the ridge tiles and the slopes needs sealing. That is the role of the flexible strip, sometimes called a union strip or ridge roll. It is laid along each side of the ridge, bridging the space between the top course of roof tiles and the underside of the ridge tile.
Most strips are made of a flexible, UV-resistant material with an adhesive backing, and many include a mesh or a breathable section so air can pass but rain and snow cannot. Each manufacturer gives its own detail. The strip adheres to the roof tiles on one edge and sits under the ridge tile on the other, so that water running down the slope is shed on to the tiles and not into the roof space.
Because the strip does the sealing, it should be pressed on to clean, dry tiles. Moss, dust and loose grit stop the adhesive from gripping, so the tops of the tiles are brushed down first. On a clay or concrete roof that has weathered, the surface may need extra attention for the strip to bond.
A strip that has lifted at the edge is the usual first sign of trouble in a dry ridge. It is quick to refix if it is spotted early.
Unlike mortar, the strip is a replaceable part. If it fails after some years, it can be renewed with the ridge tiles left where they are, which is one of the practical advantages over a bedded ridge.
On a roof with a lot of exposure, such as an open site on the edge of a village, the quality of the adhesive and the width of the strip matter more. We choose a strip with the manufacturer's recommended overlap on the tiles, and we check the seal by hand along its length before the ridge tiles go on.
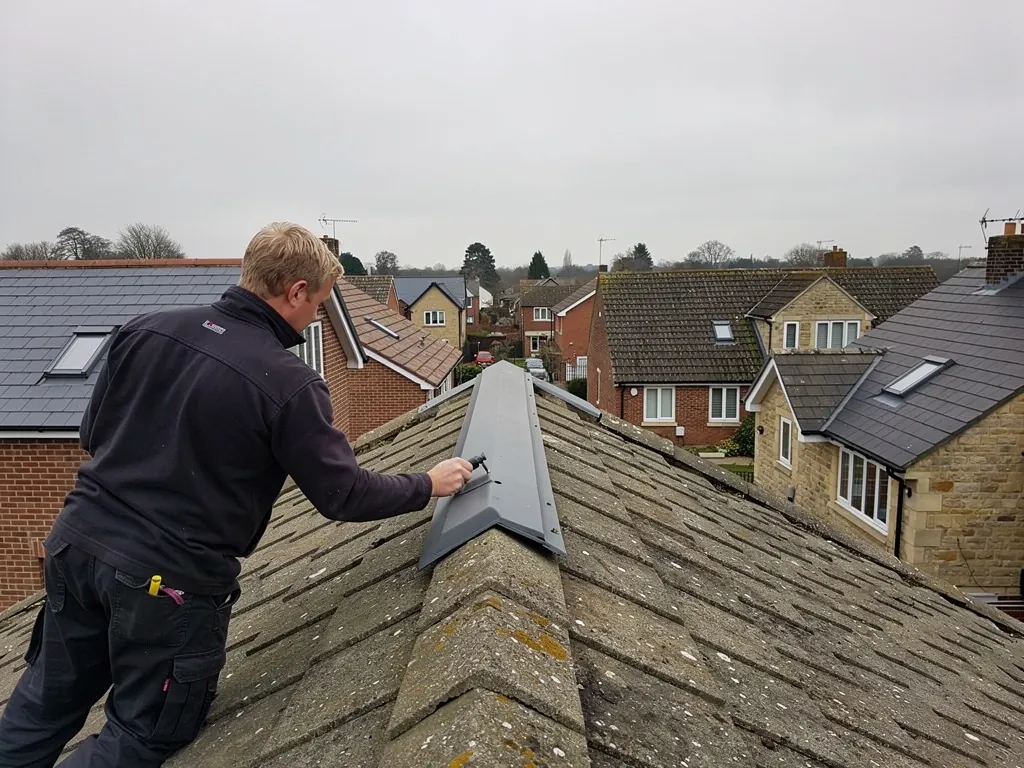
Clips, screws and the ridge tiles themselves
The ridge tiles sit on the batten and are held with fixings. The exact kind depends on the system: a metal clip that grips the tile and screws into the batten, a stainless screw driven through a pre-drilled hole in the tile, or a combination. Either way, the fixing goes into timber, not mortar.
Ends need particular care. Where a ridge finishes at a gable or meets a hip, the end tile or cap has its own fixing, because that is where the wind gets the best purchase. At the ridge ends, a mechanical end cap is common, and it is worth checking that it is part of the same range as the rest of the system and not an improvised cap from another maker.
Why do the fixings have to be stainless or coated?
Because the roof gets wet, cold and salty air, and ordinary steel fixings corrode. A rusting screw loses its grip and stains the tile. Good systems specify stainless steel or a durable coating for exactly this reason.
Can ridge tiles be matched to old roof tiles?
Usually, yes. Dry-fix kits are made for the common ridge shapes, whether half-round, angled or the deeper profiles on some heritage roofs. For unusual or reclaimed tiles, we talk through the options at the survey, as an exact match matters on a roof that is seen from the street.
Spacing is a quiet detail worth knowing about. Manufacturers state how far apart the fixings go along the ridge, and the figure varies by system and tile. We follow the instructions supplied with the kit, because a missing fixing in the middle of a long run is where wind lifts a tile first.
Why BS 8612 tested products are worth asking for
BS 8612:2018 is the standard that lays down what a factory-made ridge, hip or verge kit must satisfy. BSI published it on 31 January 2018. Marley treats it as the benchmark test for such kits and points out that a product can only claim compliance if it has really been tested.
The consequence for a homeowner is that the parts are designed and tested as a package. The batten, the strip, the clips and the tiles are meant to work together. If a fitter swaps in a cheaper strip or a different batten, the roof no longer matches what was tested.
How do I know the system is tested?
Ask for the manufacturer's name and the product data sheet, and look for the reference to BS 8612 on it. A trustworthy supplier will give you both without fuss. We list the system in our written quote so you can check it for yourself.
Does it affect a roof guarantee?
It can. Manufacturers' warranties generally depend on their system being fitted as specified, and the labour on our side carries a 10-year written guarantee. A tested system, fitted to the maker's instructions, gives both guarantees something solid to rest on. For what this does to the budget, read what ridge repairs cost.
Ventilation through the ridge
Plenty of roofs need air drifting through the roof space, so that moisture cannot gather and condense on the timbers. A dry ridge can be part of that, and some kits include a ventilated version with a mesh or slot that lets air out at the very top while keeping rain and insects out.
Marley's advice, drawn from BS 5250 on moisture in buildings, sets out numbers for cold roofs. Where the underlay does not let vapour through, it asks for a 25 mm eaves gap running the full length on pitches up to 15 degrees, and 10 mm on anything steeper. It adds a continuous 5 mm opening high up when the pitch is above 35 degrees, when the span is over 10 metres, and for lean-to or mono-pitch roofs.
That high-level gap is exactly what a ventilated dry ridge provides. If your roof needs it, it is a neat way to meet it. If you are unsure whether yours does, we look at the underlay type, the pitch and the eaves detail on the survey, because the answer differs from house to house. Our page on ventilated ridges goes further.
Can I add ventilation later?
Sometimes. If the roof has a breathable underlay and good eaves ventilation, nothing more may be needed. If the loft is damp, we check the cause before changing the ridge, since ventilation is rarely a cure for a leak.
What can go wrong, and what a good fit looks like
Dry ridge failures are fairly predictable. A strip that was applied to dusty tiles peels away. A batten set too low or too high leaves the ridge tiles rocking. Screws overtightened through a tile crack it. Mixed components from different makers fit loosely. Each is a fitting error, not a fault in the idea.
A good installation is quiet to look at. The ridge line is straight. The tiles sit evenly, with consistent spacing. The strip is stuck down flat along its full length, with no wrinkles. The ends are capped neatly, and there are no loose offcuts on the roof or in the gutters.
If you already have a dry ridge and something looks wrong, the cause is usually easy to find and fix. Our guide to types of dry verge covers the matching edge detail at a gable, while noise from dry-fixed edges is the page to read if the complaint is a rattle rather than a drip.
Is a dry ridge a do-it-yourself job?
The work sits at the roof's highest, windiest point, so we would not suggest it. Kits are sold to the public, but the safe access and a straight batten line are where professional fitters differ.